Deityland
Deityland, formerly Giant Chasm is the map you want to be at when you're not afking or doing your dailies or some event. Unfortunately, you must be 2nd reborn to be able to enter Deityland. My suggestion is you focus this and get there as soon as you can as this is where most of your gear progression will be done besides champion points. The rewards are boundless and worth every minute of your time. What you do here is hunt monsters and perhaps players for the brave, but we'll get into that in a bit. Lets Check out what the Deityland has to offer you!
Entrance NPCS & General Info
When you first enter Deityland you will notice a bunch of different NPCS as well as a golden line. As long as you are on the south side of the line you are safe, cannot be pk'd, or captured no matter your name status. A lot of players use this to their advantage since you are only able to use one PK amulet every 30 minutes. They will instead use Safe Zone scrolls and either wait out until they're white named again, or go to Dragon Island or Twin City use a pk amulet and return to what they were doing.
NPC List
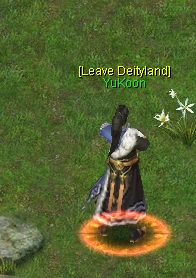
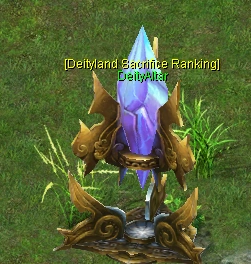
The first npc you should be familiar with is Yukoon. Their only function is to teleport you to and from Deityland. Next is one that you'll want to pay attention to this is the Deity Altar. This one is one of the most important you'll want to pay attention to throughout the day. Once you click on it you can view the Jade submission rankings. The rankings will show the current number of jades that people have submitted for the day and their expected reward if the rankings hold. You can get Jades from hunting,
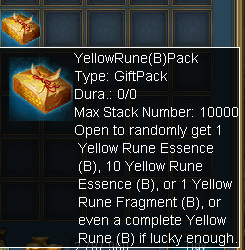
trading, or killing other players who are carrying them on themselves as they are dropable. If you don't have enough for the day to get the rank you're wanting then you can go ahead and save them as they don't expire! Beware though, once the time hits 23:57 you can no longer submit the jades and thus whatever is submitted at that time is to be considered the final rankings so be sure to count your seconds if you're going for that top prize! Regardless of if you're going for rankings or not, everyone should submit at least 10 jades a day as by doing so you will get a free Yellow Rune B Pack sent directly to your mail.

Next you have the NPC Jackery. They give you free Bliss each day which is decided on either A. you are in the guild with the player who accumulated the most points the previous day, thus giving you 6 stacks of bliss. Or B. You weren't so you get 3 stacks. The scores are gained by killing monsters, and doing damage/killing bosses. You also have the chance to lose points if you are killed, this includes by another player. The top 10 players each day like the jade submission gain a reward. This time it is Chi points with the leader gaining the most.


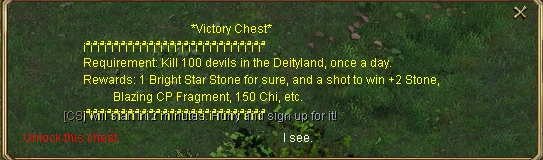
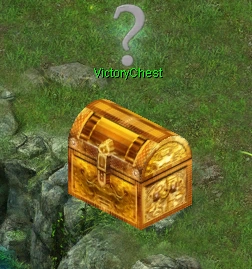
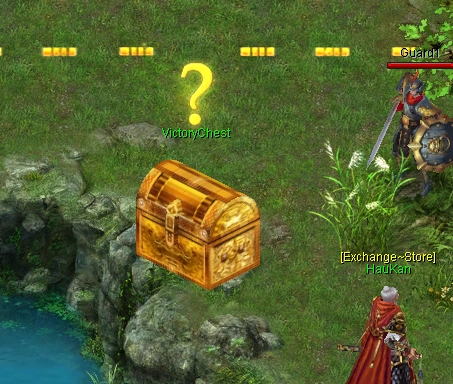
To the left of Jackery you have HauKan who is basically a shop NPC. You can trade the Wonder Herbs you find by hunting with him for prizes such as +1/2 Stones and Star Stones. Next to him you have the Victory Chest. This is the daily quest that you complete by killing 100 of the monsters on the map regardless of tier. The reward gives you one Bright Star Stone and a random other item usually some amount of Chi. You can do this only once per day.

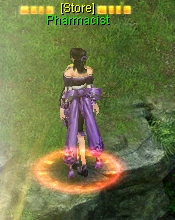
Going towards the center you have CobbWind. This npc's use is pretty simple. He tells you when the next boss is going to be spawning and if it is already spawned he will teleport you there directly. He also gives the function to teleport to any of the main boss islands when one is not spawned save for Nemesis or the Queen of Evil. On the far right there is the Pharmacist which does as any Pharmacist does, sells potions. This one also sells Break and Immunity potions which can only be used on this match which can be useful for PVP, or PVE depending on the situation. The final two are both dealing with Relics.


The first is named Saint Taiyi. His first job is to craft you a random relic if you have 100 relic crystals which are obtained from hunting each day. The second thing he does is sell you a Relic Spirit each day for 50k and you can choose any of the options to craft a random relic from met scrolls, to using dragon balls, or even small sash's!

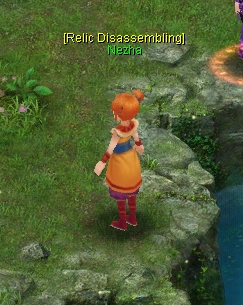
The final NPC is named Nezha and their job is to destroy junk relics that aren't worth being used or sold. In exchange they give you back the Relic Spirits which are again used to create random relics, or used to repair the good one you have by right clicking on the Relic Spirit with your good relic equipped.
NPC ISLAND
This is the small center Island. There are a couple benefits here. The first benefit is if you have already bought out all the + stones and star stones and still have wonder herbs you can go here talk to the same NPC and they will have the same amount available so you can buy up to double of each item by visiting these npcs. The same concept can be used by talking to the Jackery of this island to get the free bliss twice. The Deity Altar won't grant two prizes so no need to come here for submitting jades.
Normal Monsters And Drops Explained

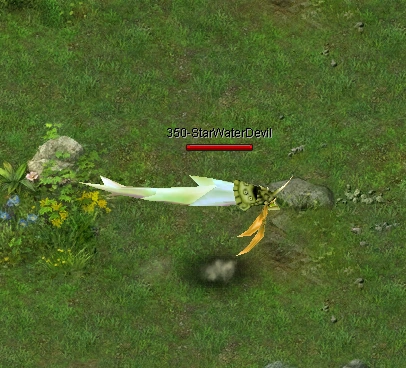
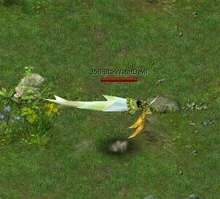
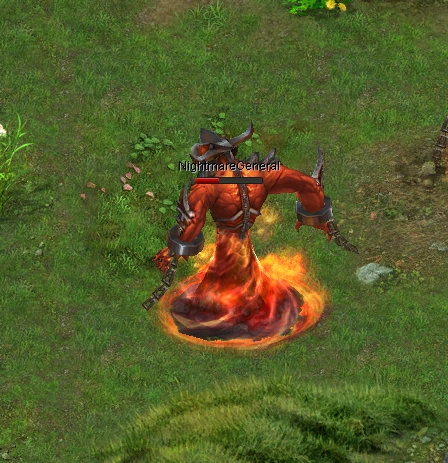
Normal monsters are monsters that are everywhere on the map and re-spawn instantly. There are 4 sets that are as follows: Water Devil, 300-StarWaterDevil, 350-StarWaterDevil, 380-StarWaterDevil and Nightmare General. All the Water Devils look the same besides the name. It is theorized the higher level the monster the better drop rates & loot. This is not proven, therefore, it is best to stick to the ones you can 1 hit, or at least the ones that take you the shortest amount of time to kill. To kill any of the monsters besides the basic level water devil you will need that BP level or it will be as if that monster has counteraction. You will need to use the Breakthrough Potions on the map, or if you have high breakthrough already then the sprite buff should be enough. It is believed you need 250%+ BT to break these guys, though it could be more. Be careful around the Nightmare General, they spawn on the top of the top right boss island and do massive damage. They also have 410 battle power so even as a king, you will need the break potion to kill these guys!
Frequent & Infrequent Drops
Killing these monsters works just like on any normal map, but they have much better drops that you can get. These are the drops that you can get and how frequent you find them is what determines the category. Starting at Frequent Drops these drop every few monsters doesn't take a lot of searching to find the items in this category, however, Infrequent Drops can take quite awhile to find.
| Frequent Drops | Infrequent Drops |
|---|---|
| Mets | Rotten Incense |
  Its a sea... of mets. Yeah not that great between this and auto hunting your warehouse will be overflowing. Pick if you need, otherwise don't waste the time/inventory space and just move onto better things. |
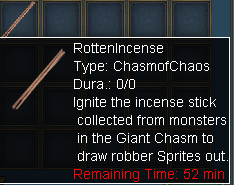  This is an item used to summon the Mini-bosses in Deityland. |
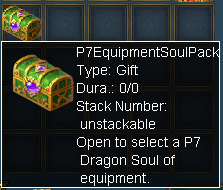
| Soul Scroll & DragonSoulPack | Favored Training Pill |
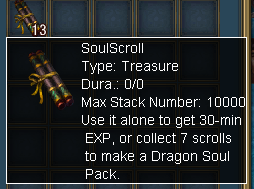  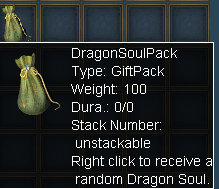 The worst drop in here due to after gathering 7 Soul Scrolls and obtaining a DragonSoulPack you can only obtain up to a Phase 6 soul (it is random) when you need to get a Phase 7 to stay competitive at end game. |
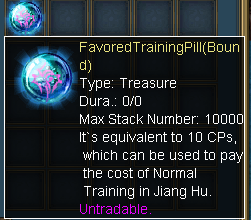  Item used to train your Jiang Hu, learn more about it by clicking the link. |
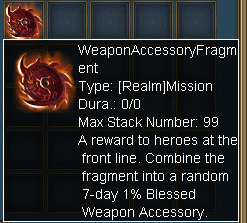
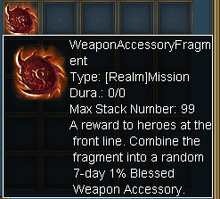
| Accessory Pack Scraps | Twilight Stone Star |
 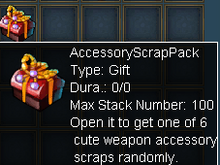   This is the 2nd worst item although it gives you cool looking weapon accessories(skins)it only gives fragments in which you have to collect 7 to make one and which one it gives you is random. |
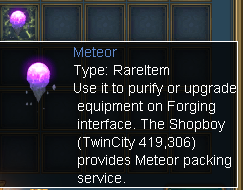
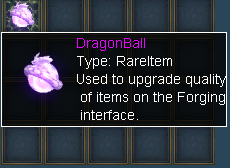
 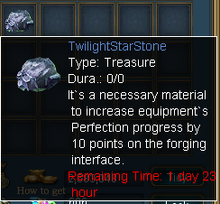 Used for Perfecting items in the forging menu. Click the link for more information. |
| Study Pack (50 points) | Joyful +1 Stone Pack |
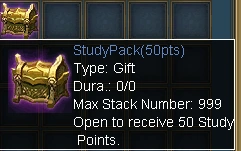  This is the 3rd on the list while nice study points are quite easy to get. |
 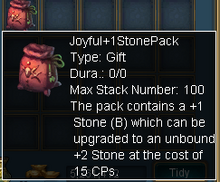 Open to receive the +1 stone bound, not worth paying the cps to upgrade it you can buy a non bound cheaper. The stone can be used for +ing your gears or perfecting them. |
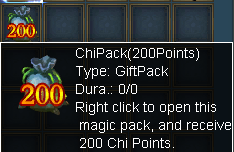
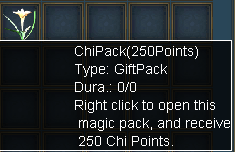
| Super Protection Pill | Chi Pack (150 Points) |
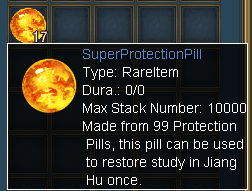  While useful and great to have, it is only that way until you max your Jiang Hu. Learn more about it by clicking the link. |
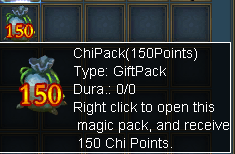  Know how I said to pick up the 50 packs? Well you Definitely want to pick these up. |
| Vigor Pill | Chi Pack (200 Points) |
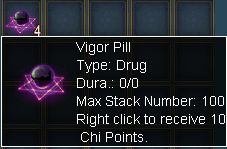  Free Chi, but only 10 points each so it is pretty "meh". |
  You don't have to pick these up, they go into your inventory automatically. Isn't that nice! |
| Rare Chest Key | Dragon Blood Stone |
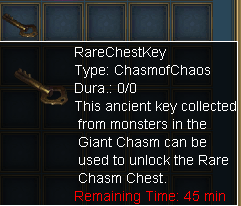 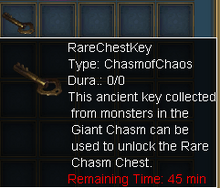 Used to open the Rare Chest. |
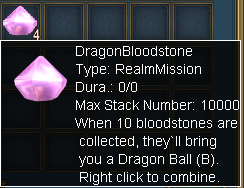 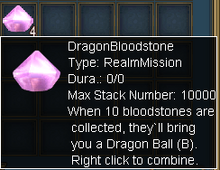 Always good, grab 10 of these and get a Dragonball which even if your gear is all leveled you can exchange for 800 chi points. Please see Chi to learn more about this. |
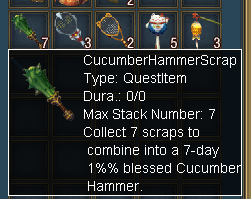
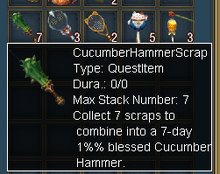
| Chi Pack (50 Points) | 7 Day Weapon Accesories |
 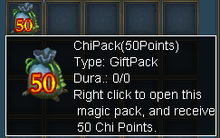 Always pick these up, you'll never not need them except maybe in 10 years from now, if you're lucky. |
  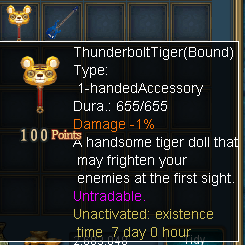  This is an awesome item if you don't have perm -1 accessories. The down side is that its random what you get and can get anything from shield, 1 hand, 2 hand, and bow accessories. |
| Wonder Herb | Jade Of Faith |
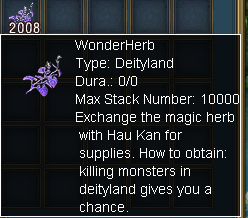  Formerly Chaos Bead, this item is used to exchange for prizes with HauKan at the entrance of Deityland. |
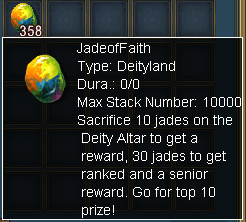 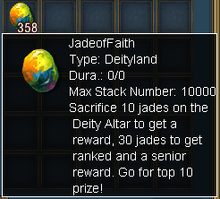 These go directly into your inventory, however, they can be dropped if you die so be careful! Each day 10 can be sacrificed at the Deity Altar at the entrance of Deityland for a free daily prize. Any submitted after that are to try and go for the rank prize for the day. You must submit at least 30 to be qualified, however, there's almost 0 chance that little will get you ranked. |
| Deityland Wishing Gate | Safe Zone Scroll |
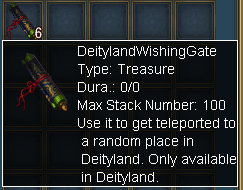 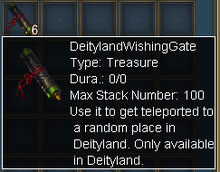 Have you ever played Musical Chairs? What about Musical Island? This takes you to a random island in a random spot. |
 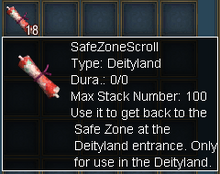 Blood soaked scroll that looks as though someone bled out while trying to use. Takes you to the safe zone. No one can pk you here when flashing or red name in any mode just beware of the 2 guards above you! |
Epic Drops


You are limited to the amount of drops you can get per day that are epic. Each drop consumes what is known as your "luck points" after your luck points are gone, you can no longer get these drops for the day. These are the drops that pop up at the top left of the screen when you get them and notify the whole server... so be careful if an enemy is nearby! The amount of epic drops you can get per day is 9-10. If, however, you don't use your luck points for that day what you don't use rolls over to the next.
Guaranteed Drop Mobs
There are monsters that look the same as the other ones and they spawn randomly with them. These monsters take 1 damage and after you kill it will give you a guaranteed Epic Drop as long as you haven't reached your quota. If you have reached it you will receive a Wonder Herb as well as a a low chance at one of the Frequent/Infrequent drops. This acts similar to the Rare Chest.
Reward For Using Your Daily Luck Points
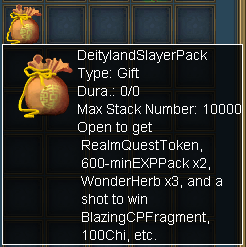
After you run out of "Luck Points" you will then be able to collect a Deityland Slayer Pack which gives you all sorts of prizes including a Guaranteed Realm Quest Token used to complete one of four of the daily realm quests except for the Alluring Witch Quest. Two 600 minute Exp packs good for both Exp and then 300 study points at max level. The Exp packs here don't give chi points out unfortunately. You also get 3 Wonder Herbs. You also have a chance to get more items, for example: random chi or + stones etc. *Note this seems to only happen some days and not others, I will update this if I can figure out why that is.

Stacks Of Bliss

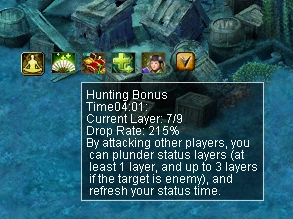
You gain what is known as "bliss stacks" by killing someone. It can be friend or foe, one would hope it's the latter you are slaying. You can have up to 9 stacks in total which gives you +10-20% increased drop rate per stack starting at 115% level 1. The max you can obtain is 250%. The hunting bonus lasts for 5 minutes and resets each time you kill an enemy and gain a new stack, even if you are at 9. If however you do not kill an enemy before the timer runs out, regardless of how many stacks you have, you lose all of them and have to start back up from 0. If you die to an enemy player you will lose 1-2 stacks if you have any and your timer will remain counting down from its current amount.
WARNING
This map is no longer a free pk zone so you DO incur pk points when killing opponents. Beware of your pk points as you can go red/black named and lose your gear! All players gain +100k hp buff for a few seconds after they revive. If you are fighting an epic warrior, beware of their backfire as if you do not do over 100k damage to them it will most like end up ONE SHOTTING YOU. You have been warned.
| Epic Drops |
|---|
| Wonder Herb Pack |
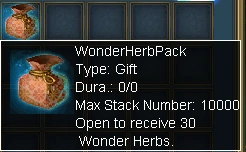  Formerly Chaos Bead Pack. This has the same function and when used gives you 30 Wonder Herb instead of Chaos Bead. |
| Senior Refinery Material Wheel |
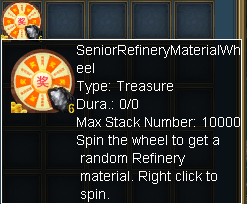  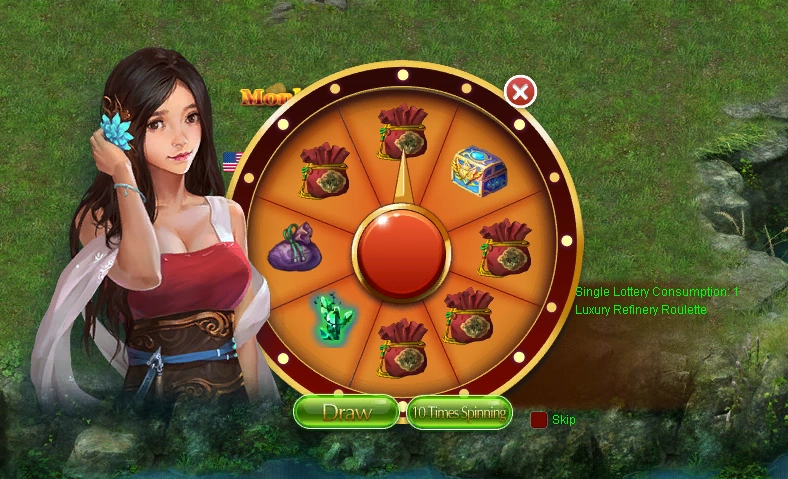  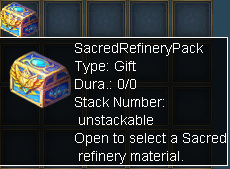 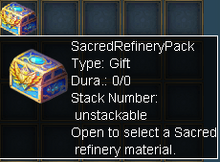 The worst of the 3 wheels, only has one really good spot and an ok spot that you want to land on for the Sacred Refinery Pack. |
| Senior Armor Soul Wheel |
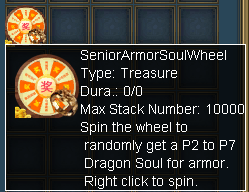   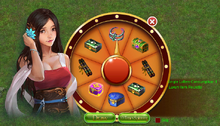   This is the second best wheel it has a full P7 Equipment Soul Pack that you can land on, as well as one savage bone location. |
| Senior Weapon Soul Wheel |
 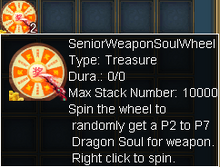 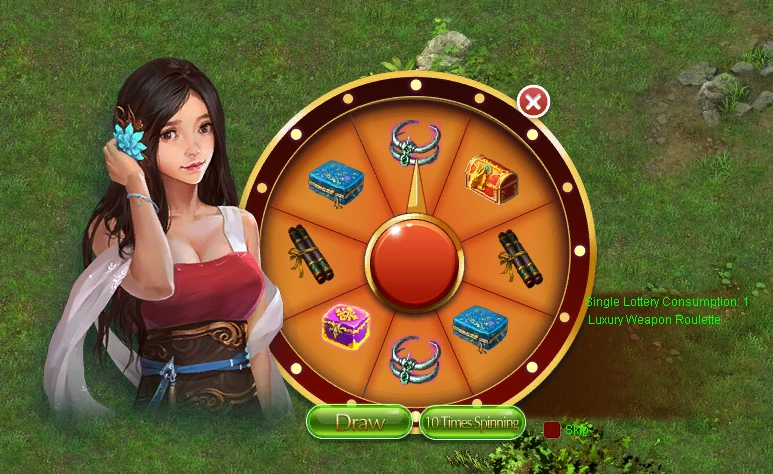  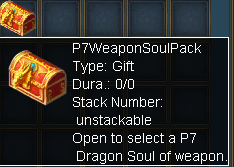  Best of all 3 wheels. It has 2 savage bone spots as well as 1 P7 Weapon Soul Pack slot. |
| Fancy Cave Flag |
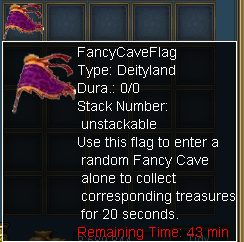  Takes you to a cave of very weak monsters. In that cave the monsters will drop one of the following items: 10 Chi packs, Twilight Star Stones, +1 stone packs. You have 20 seconds to kill and loot as much as you can. When you enter the cave it gives you a full bar of your XP skill so it's best to choose any that give you a speed boost for faster looting. The Twilight Star Stones do not stack so I suggest you make sure you have an empty inventory before using this item! |
| Epic Chest Key |
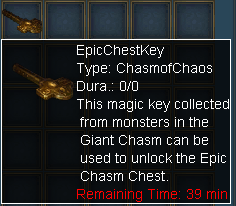  Used to open the Epic Chest!! |
| Deityland Attribute Pack |
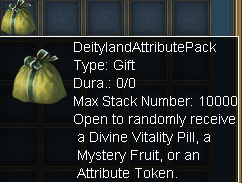  Chance to get any one of the four Attribute tokens, Mystery Fruit, or a Divine Vitality Pill. See here for more information on these items and how to use them. |
| Dragonball |
  Dragon dragon, rock the dragon, dragonball for chi. |
| Deityland Stone Pack |
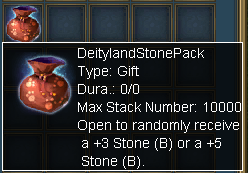  This replaces the Joyful +3 Stone pack from Chasm and also gives you a decent chance to get a +5 stone instead. It's a great edition to the new map! |
| Knowledge Pill Scrap |
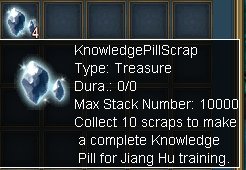  Great for getting when your Jiang isn't done, not so great afterwards. Usually a lot of these are left on the ground from Grade 15 Jiang users. Check the link for more information about these. |
| Faithful Jade Box |
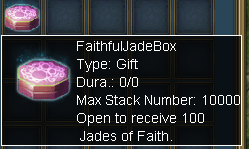 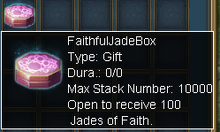 Used to get 100 Jades of Faith Instantly. Not a bad drop if you're going for the rank prize. |
| Deityland Yellow Rune Pack |
 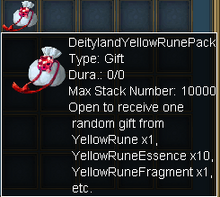 The items inside this are unbound so when opening please be careful as you can drop them! |
| Chi Pack (150 Points) |
| Know how I said to pick up the 50 packs? Well you Definitely want to pick these up... this seems.. familiar? |
| Chi Pack (200 Points) |
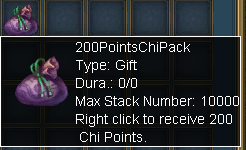 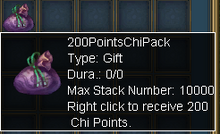 Unlike the green 200 pack, this one consumes luck points to find. Unfortunate, but hey it is still 200 chi points. Not too terrible. |
| Chi Pack (1000 Points) |
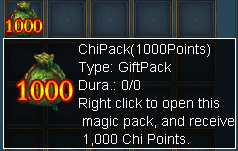  Best Chi drop in the game even surpassing the 800 chi from a DB. This is one of the best drops in Deityland. |
| Frozen Chi Pill Scrap |
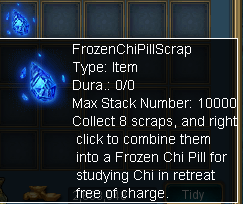  Probably the best item to loot next to the 3000 bound/unbound cp item from the epic chest. After you collect 8 you combine them to be able to retreat a stage of your chi for 5 days. You can then roll your bad stats to try and improve them. To learn more please click here. |
| Deityland Star Pack |
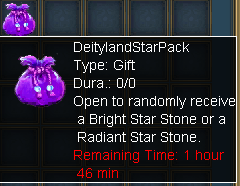  The upgraded version of the Chasm Star Pack. This has a much better chance of netting you a Radiant Star Stone than the previous pack did. |
.PNG)
Cross Over Drop
The 150 Chi pack token can both consume luck points, and be found without them.
Retired & Semi Retired Drops
Retired drops that were available during the Giant Chasm, however, they no longer drop in the new map Deiityland. The Semi-Retired drops don't drop from normal monsters anymore. Still can be exchanged for with Wonder Herb, or found from mini bosses/bosses.
| Retired Drops | Semi-Retired |
|---|---|
| Rare Skill Soul Pack | Joyful +2 Stone Pack |
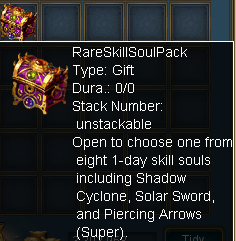  This gives you a 1 day soul skill for some skills. You need to have at least level 14 Jiang to use. Some of these skill souls are not available for purchase yet. Please click the link for more information on Skill Souls. It was a Giant Chasm exclusive drop. |
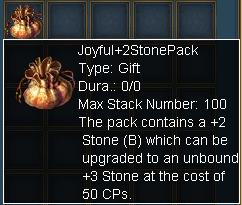  Open to receive the +2 stone bound, not worth paying the cps to upgrade it you can buy a non bound cheaper. The stone can be used for +ing your gears or perfecting them. |
| Chaos Bead Pack | Joyful +3 Stone Pack |
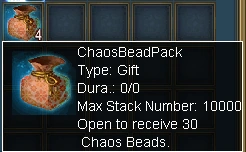  Replaced with the Wonder Herb Pack in Deityland. Pretty self explanatory, open it to receive 30 Chaos Beads. |
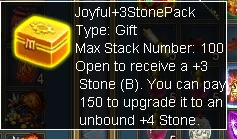  This was the best stone drop in the Giant Chasm, it also seemed to be quite harder to come by than most other items. |
| Chaos Bead | Savage Bone |
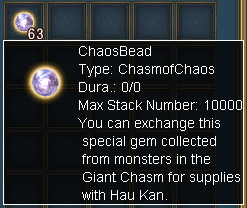  Replaced with the Wonder Herb in Deityland. Used to gather rewards at the entrance of Giant Chasm. |
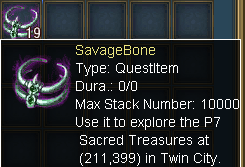  Pick these up when you find them and pray to rnjesus for those p7 equipment packs and sacred refinery packs. Please see the Savage Bone section on this page to learn how to use these. |
| Chasm Star Stone Pack | Chi Pack (250 Points) |
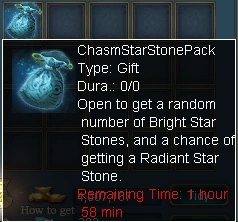 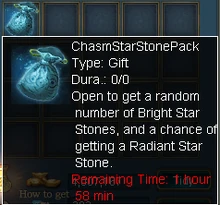 This was a Giant Chasm Drop that Granted 1 - 3 Bright Star Stone and on a rare occasion a Radiant Star Stone. |
  Replaced with the 200 chi pack. Less chi but at least it has an image? -_(o.0)_- You can also still get these from the Chi Sprite on a rare occasion. |

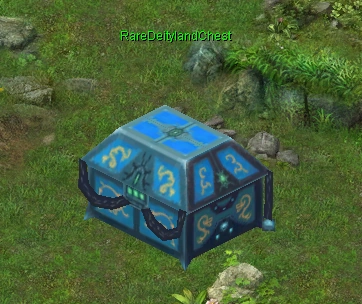
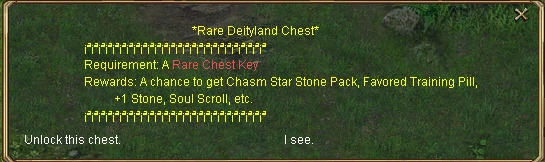
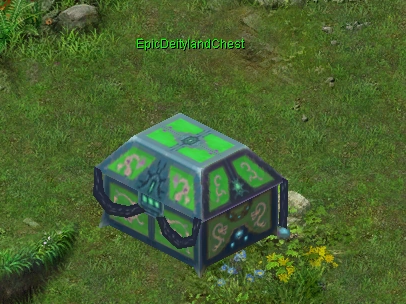
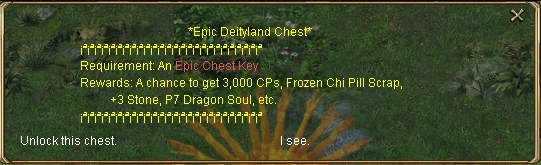
Rare & Epic Deityland Chests

There are two chests in Deityland that you need to gather keys for these are the Rare and Epic chests. To obtain a key you just need to kill any of the normal monsters on the map and you will have a chance to find one. They go directly into your inventory.
Rare Chest
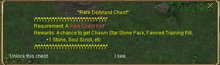
While the Rare Chest isn't all that good, you should be able to find enough of them while jumping around looking for other items. Rare chest rewards are usually only 1 Wonder Herb and sometimes it will give you something out of the frequent drops. On rare occasions it will give you an infrequent, drop get it? ;)

Epic Chest
These chests are really nice and give you all sorts of goodies. You can get anything from a +2/3 stone pack, to a frozen chi pill scrap all the way to a reward that allows you to get either 3000 bound, or even unbound cp! This is of course really rare to get but there's always a chance you could be the next! Remember that these keys are on a 1 hour timer, so make sure to unlock one before you miss your chance!

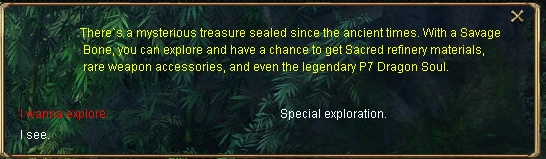
How to use Savage Bones

Savage bones are gathered from chests, monsters, mini-bosses, and bosses. To use your bones you will need to go to the Market/Twin City map at coordinates (211, 400).Next you want to click on it have your Savage Bone(s) in your inventory and then click I wanna explore do not click Special Exploration this costs you 37 cp a chance and even if you got the best thing it's about 500k-1mil overpriced.


From there just click "I've got a Savage Bone" and good luck! You can get accessory scraps, 500k, refinery and soul scraps etc. What you're after is the full Sacred Refiniery/P7 Weapon and Armor Soul boxes so you can pick what you want to use/sell.
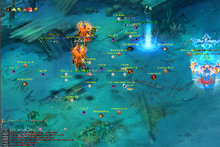
Boss & Metdove Locations
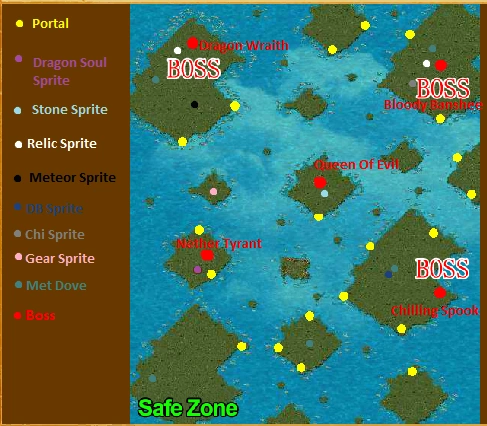

Note: The sprites no longer spawn at a fixed location or on the map at all. The only way to get them is by using the Rotten Incense I opted to leave this map for historical reasons.
This is what I believe to be a complete map of the bosses and sprites/met dove locations. It took me awhile to locate all these, and I had help from some people in a skype group on finding the others so thank you for that. There are probably a few met doves that I missed here.I will update this map periodically when I find more spawns. I hope this helps you in your journey.
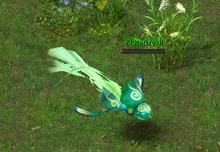
Deityland Sprites (Mini Bosses)


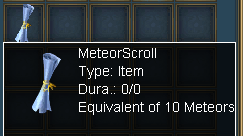
Deityland Sprites, or "Mini Bosses" as I call them are just as stated, Miniature bosses. After you kill them you have a chance that they will grant you a random special buff along with whatever they drop for you to gather. They take 1 damage per hit and it takes 10 hits to kill one. They may have slightly different shades to them, but other than that they look identical! They spawn they can only be summoned by using the item Rotten Incense this has a small chance of being collected by killing normal monsters or by opening a chest.
Types of Sprites & Rewards
There are the different kinds of Sprites:
| Sprite Type | Reward |
|---|---|
| Meteor Sprite | These will grant 1 - 3 met scrolls at random which contain 10 Mets a piece. |
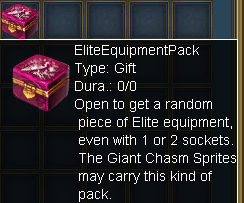
| Gear Sprite | These will grant you an Elite Equipment Pack which once you open gives you a 0 - 2 socket random piece of elite gear. Good for socking your talismans or some quick money. |
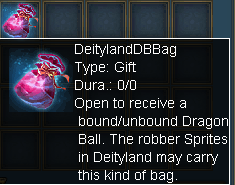
| DB Sprite | These will grant you a Deityland DB Bag which will give you either a bound Dragonball, or a small chance to receive an unbound Dragonball. |
| Relic Sprite | These drop you a Relic of a random quality & with random stats. They seem to have a better chance of getting higher tiered Relics than from normal mobs. |
| Chi Sprite | Drops anywhere from 50 - 250 Chi. |
| Stone Sprite | Drops a +1 - +3 Joyful Stone Pack. |
| Dragon Soul Sprite | Drops 1 - 3 Savage Bone(s). |
Retired Sprite
The Silver Sprite was retired with the release of Deityland. It was the worst one to find followed by the Meteor Sprite. It would only drop you on average 100k.
Buffs Acquired After Killing A Sprite
| Buff Type | Buff Effect | Duration |
|---|---|---|
| Maximum Hp Increase | +100,000 | 90 Seconds |
| Immunity Increase | +200% | 90 Seconds |
| Breakthrough Increase | +200% | 90 Seconds |
| Pattack & Mattack | +10k Pattack, +30k Mattack | 90 Seconds |
| Cyclone Imitation | Increases your movement speed, as well as lowering your stamina cost on skills by half. (Does Not Increase Attack Speed). | 90 Seconds |
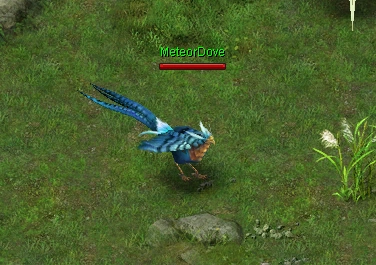
Meteor Dove

This is a throw back to the 1.0 days when the Meteor Zone was good. You can find these randomly around the map, they drop 5 mets.
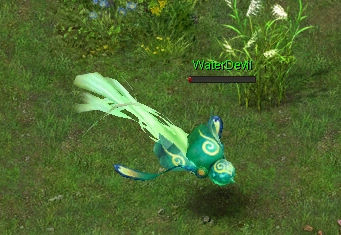
DB Devil
This is another throw back to 1.0. This mob is pretty rare to find. It definitely spawns on the bottom right boss Island with Spook, however, I'm sure it may spawn elsewhere. I hardly ever farm anywhere else so I'm not 100% sure on this. Good luck hunting! It drops an unbound Dragonball!
Bosses & Rewards
There are different bosses in Deityland that each have their own spawn timer, location, and skill set. Check below to find the correct time for each boss as well as an idea of what to expect when facing it. First, let us take a look at the rewards every boss gives.
Rewards

Piñata Drop

All bosses drop basically the same thing which can vary from Chi packs, Jiang Training Items, Wonder Herbs, Exp Packs, Meteors, Savage Bones, and Study Points. These items are only available to loot by the killer of the boss. The bosses will be like a piñata and while it will still drops a few items available only to the killer, it will also drop an explosion of random items. While these usually aren't the greatest they are still available to free loot, even if you did nothing and happen to be passing by. The piñata loot can consists of Wonder Herb, Protection Pills, Study Points, 60min Exp packs, Vigor Pills, Mets, and 7 Star Pouches, Savage Bone, Knowledge Pills, etc.
You can also get a free set amount of chi sent to you in the mail for ranking high enough on the damage charts for these bosses.
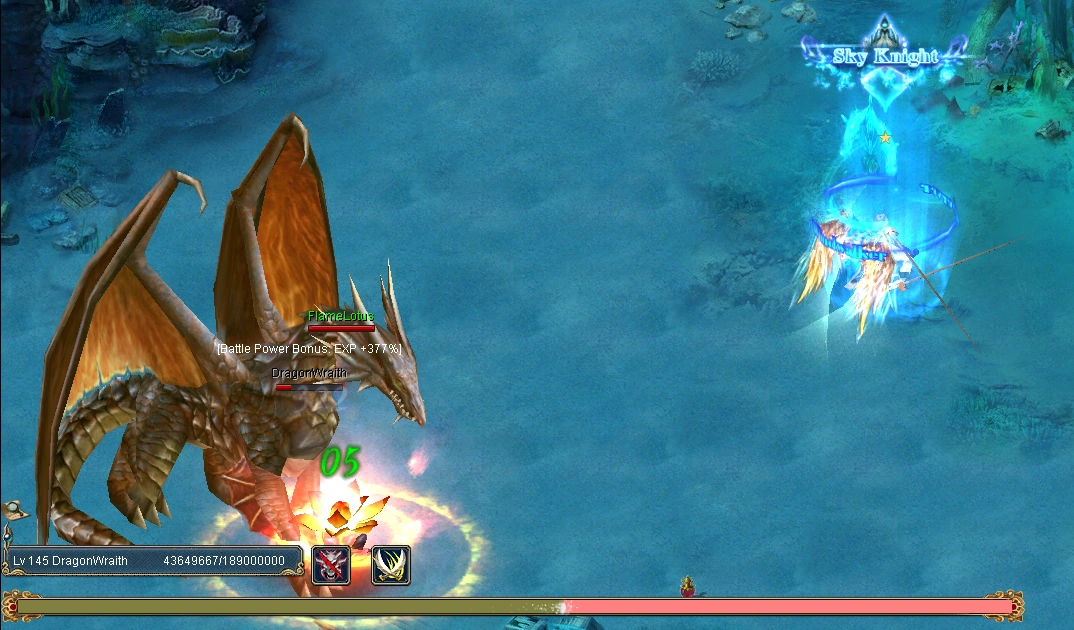
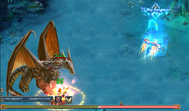
Dragon Wraith
This boss spawns at XX:05 every hour. This is the easiest boss and only has 189mil HP. This boss does mild damage and no disables so its pretty fast to do regardless of range or melee class. 250+ bp P4 characters should do fine here, minus enemies.
Dragon Wraith Damage Rank Chi Rewards
|
Damage Rank |
Chi Rewards |
Other Rewards |
|---|---|---|
| 1 | 400 Chi | Blazing Cp Fragment |
| 2 | 200 Chi | N/A |
| 3 | 200 Chi | N/A |
| 4-10 | 150 | Soul Scroll |
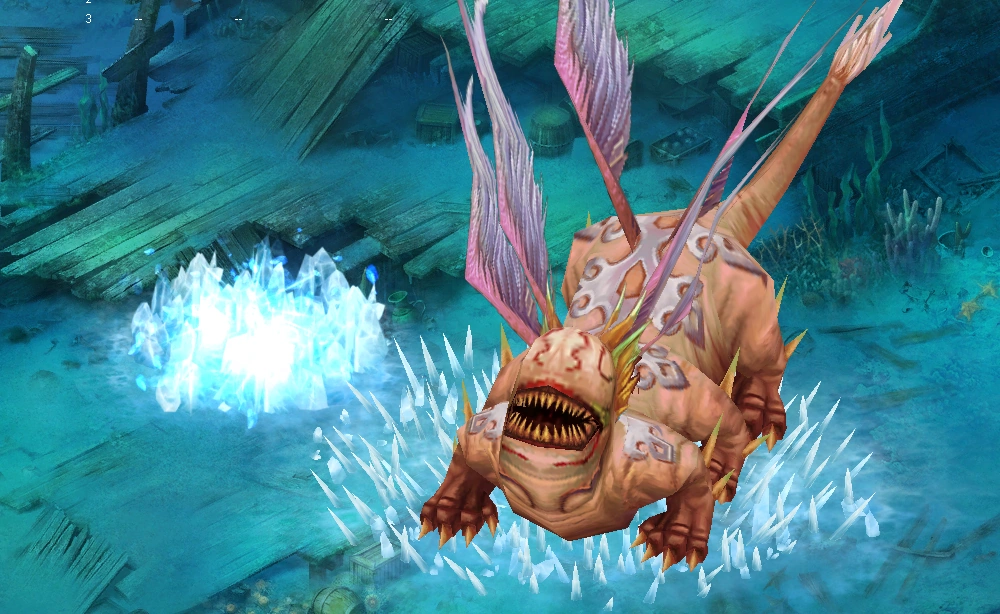
Chilling Spook

This boss spawns at XX:30 every hour. Their damage is mild-medium depending on your gear. They are pretty annoying to kill if you're not a ranged class due to his freeze and fear skills and it has 240million HP. Other than that, they're a pretty easy boss just watch out for enemies and you should be alright otherwise as far as your health goes. This is assuming you are in P6/P7 gears when fighting them, if not you should probably look into applying some of these souls to your gear.
Chilling Spook Damage Rank Chi Rewards
| Damage Rank | Chi Rewards | Other Rewards |
|---|---|---|
| 1 | 400 | Blazing Cp Fragment |
| 2 | 200 | N/A |
| 3 | 200 | N/A |
| 4-10 | 150 | Soul Scroll |

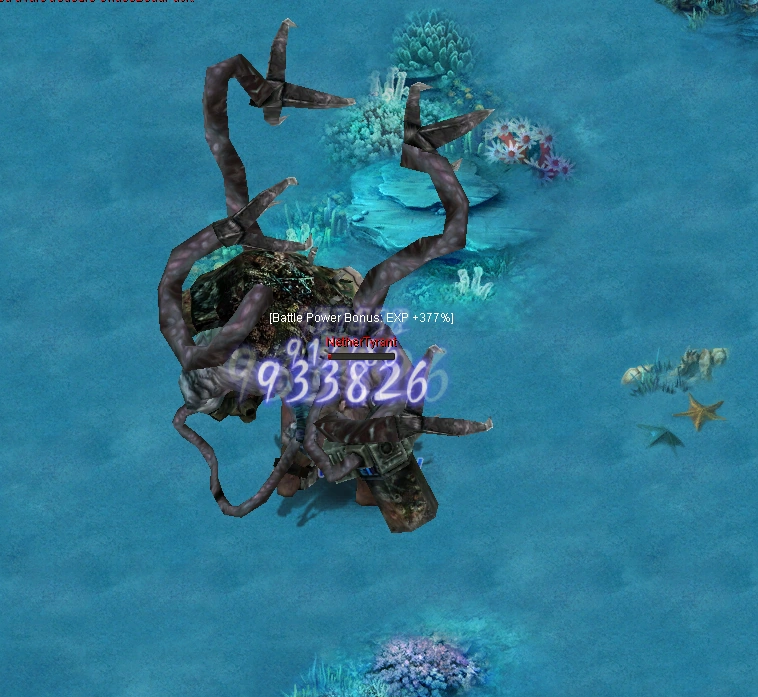
Nether Tyrant
This boss spawns at XX:45 every hour. This is the most powerful boss in the game and has an attack that can 1 shot most people. It has 320million HP also has a stun, freeze, self-heal, and another skill that does a decent amount of damage as well. I would recommend being in P7 with a minimum of 320+ bp for non ranged class characters. Ranged characters may be able to get away with 300+ P7.
Nether Tyrant Damage Rank Chi Rewards
| Damage Rank | Chi Rewards | Other Rewards |
|---|---|---|
| 1 | 400 | Savage Bone |
| 2 | 200 | N/A |
| 3 | 200 | N/A |
| 4-10 | 50 | Soul Scroll |
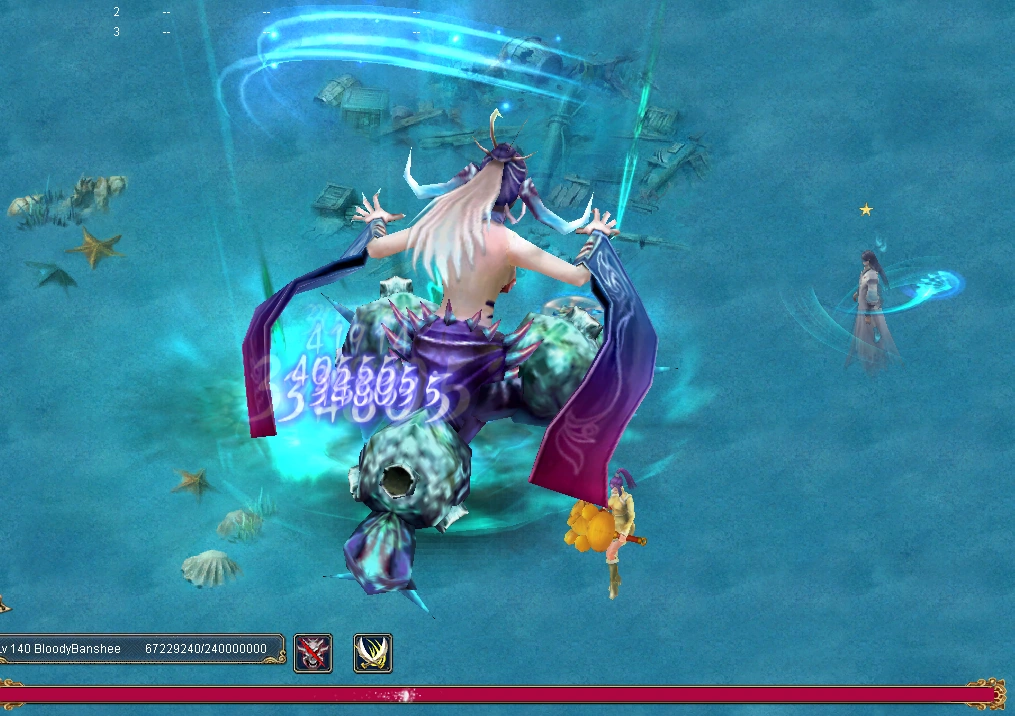
Bloody Banshee
This boss spawns at XX:57 every hour. This boss has 240million HP and does mild damage. It only has one disable (a freeze) that isn't as often as the others. Minimum BP for this fight should be around 300 for melee and 250+ for ranged P4+ as long as you are not tanking the damage and someone else is the focus of the monster you should do well.
Blood Banshee Damage Rank Chi Rewards
| Damage Rank | Chi Rewards | Other Rewards |
|---|---|---|
| 1 | 400 | Blazing Cp Fragment |
| 2 | 200 | N/A |
| 3 | 200 | N/A |
| 4-10 | 150 | Soul Scroll |
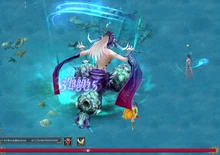
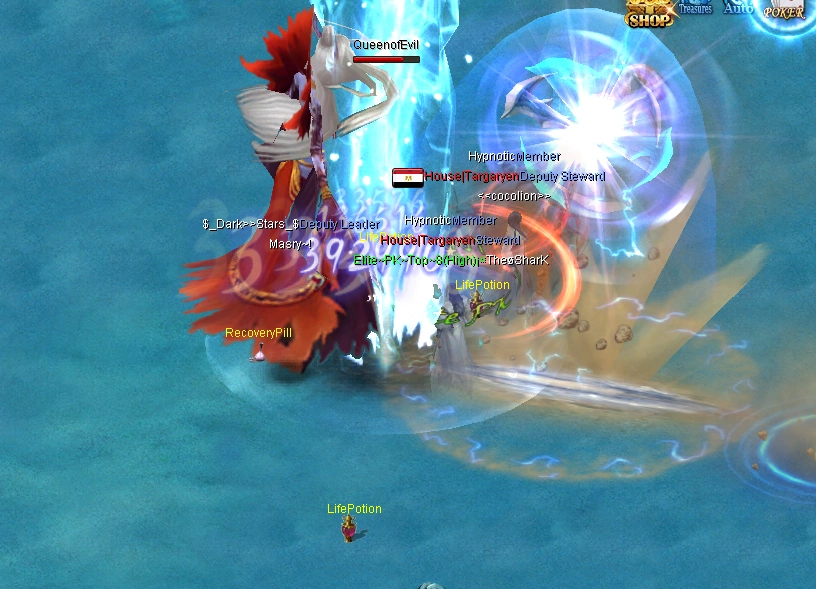
Queen Of Evil

This boss spawns at both 19:10 and 21:10 server time. She has 385million HP and does mild damage. No disables or anything annoying so she is pretty easy to kill it just takes a bit of time. BP for this fight should be the same as the Banshee just again, she's tanky so be prepared for a long enduring fight.
Queen Of Evil Damage Rank Chi Rewards
| Damage Rank | Chi Rewards | Other Rewards |
|---|---|---|
| 1 | 1850 Chi | Blazing Cp Fragment |
| 2 | 900 Chi | N/A |
| 3 | 900 Chi | N/A |
| 4 - 10 | 500 Chi | N/A |